Finding Picked Point on Item

Looking for coordinates of a picked point on an item.

Have used the pick command and the second part of that gives some coordinates on where I picked the item, however the minute I change view in any way the text that I displayed on the screen at that coordinate disappears off into space. Is there another way or a way to pinpoint the coordinate on the the actual selected item ?

Current code used

var !Pick pick
!Gen = !Pick[1].Dbref()
!Pos = !Pick[2].After('Through').Position()


Any help is appreciated

Thanks

Parents Reply Children
  • So there is a command in PML called pick. It returns a point and a direction. I initially thought that point was on the item you pick, but it's actually not. Not sure how it derives the point exactly, but it seems to be in line with how you view the model at the time and the actual point is beyond the item. Below is what it returns. From there you can use the info as per what I previously posted.

    <ARRAY>
    [1] <STRING> '=42038/9'
    [2] <STRING> 'Line N 15.2789 E 30.4124 D Through E 341491 N 102142.023 U 531967.625'

    So I create the pointvector from the above and then create a plane on the item I'm interested in and then get the intersection. That intersection is the exact location of where you picked on the item. Good for labelling an item

  • Thanks for the explanation.
    I understand it now.

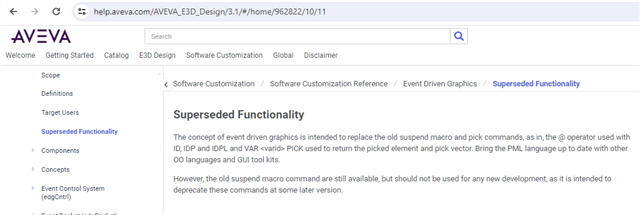
    I just remembered that the new Event Driven Graphics (EDG) functionality is introduced to supersede the PML pick method.

    The Query Position form (E3D Version 2.1) found in the Home tab -> Measure group is powered by EDG.
    I think it is possible to call in PML of the button in the form with the following:
    !!queryposition.pickpositionmethod()
    The picked position can be queried by q var !!queryposition.poscontrol.xyz()

    I think we can also refer to the code inside queryposition.pmlfrm if we are going to make our own customized  EDG code when we need the user to identify points in the Model.

  • That's ok. Yes EDG I have been looking at that for another program I am writing and I don't like how it works. Horrible. Why make something simple when you can make it difficult LOL
    I've not seen that command that you mention there. Maybe I'm looking in the wrong locations but I don't find the help documents particularly good or plentiful. They lack examples. Maybe it's just me

  • I also find EDG to be difficult to understand. Even now I still don't understand it fully.
    But there are cases that I encountered where EDG becomes the practical choice. One example is that when I need the user to do multiple picks and I need to run something in the background after each pick of the user.

    I also wonder if EDG is also going to be dropped in the future. In the newer version E3D 3.1 released, the EDG powered Query position is replaced with the In-canvas/AutoCAD style query position.  However, other functions like the Piping Editor still uses EDG in E3D 3.1..

    For now, please try:
    show !!queryposition
    !!queryposition.pickpositionmethod()
    and then query the picked position by q var !!queryposition.poscontrol.xyz()

  • Thanks
    That also works, but you get the dialgue box. Having said that, it may be useful for other things I do down the track

    WHere do you go for help and examples ?

  • For specific of Event Driven Graphics, there's two reference

    AVEVA Online Help https://help.aveva.com/AVEVA_E3D_Design/3.1/#/home/962816/10/11
    The traning manual TM-1881 AVEVA Everything3D PML Form Design (Copyrighted but can be requested from your AVEVA Account Manager / Sales Representative)


    For the Query Position form E3D 2.1 version, you can find the queryposition.pmlfrm in the PMLLIB folder in your computer to view its code.


    In general, the AVEVA Global Customer Support (GCS) is the first place to go. Second place to go is here in our forum. Much better to both contact GCS and post in the forum.

    This is their website https://softwaresupportsp.aveva.com/
    To ask a question, click the Case Management button and then click Create New Case.
    An AVEVA Technical support consultant from your region will reply to you there.

  • Thanks. Interestingly I've never come across that online help before

    I was using this one, which is ok

    help.aveva.com/.../wwhelp.htm

    As for the support line, they ask for some reference from your company or license or something don't they ? I don't represent the company I work for and they won't help without it. I tried to highlight several bugs and it went nowhere because of that. 

  • Sorry but I do not know exactly how the registration for the support works.

    In my case, I sent an email to the AVEVA Support Japan that the Case Management button is disabled in my account in the softwaresupport website. After that, they updated my profile details and it become linked to our Japanese mother company that holds our AVEVA licenses. (Our company in Philippines is a subsidiary.) 

    I believe that registration to the GCS website does not require approval from your company. I think that you just need to email them with your company email.

  • Hi Oliver, 

    I am very much interested in your method; but I didn't quite understand how it works. 

    "I create the pointvector from the above and then create a plane on the item I'm interested in" 

    How exactly do you create this plane? Could you give me an example please? 


    As for EDG, here's how you would get a position from the pick.
    This will get you JUST the position from the pick, nothing else, but it will be the RIGHT position, the position on the element:

    Assume the methods here are in a form, like 

    setup form !!PickTest

    (name of the form is important): 

    Your first method which initates the pick: 


    define method .pickSinglePoint()

            $P pickSinglePoint started
            -- picker for position
            !pick = object EDGPACKET()
            !!edgPosCntrl.setActive(TRUE)
            !pick.description = |MyPickPosition|
            !pick.action     = |!!PickTest.action(!this.return)|
            !pick.close      = |!!PickTest.close()|
            !pick.escape     = |!!PickTest.escape()|
            !pick.priority    = 1
            !pick.remove      = FALSE
             
            !pick.definePoint('pnt')
            !!EDGCntrl.add(!pick)
            $P the code ran to it's end
    endmethod

    Now we need to define the three methods for action, close and escape.
    I'll just add the prompts so if you use it for testing, you can immediatly see how it all functions. 

    -- executes when the picking is stopped by something
    define method .close()
        $P close closeSinglePickEvent
    endmethod
    -- executes when ESC key is pressed, .close() will execute first!
    define method .escape()
        $P escape escapeSinglePickEvent
    endmethod

    define method .action(!return is ARRAY)
          !data = !return[1]
          !type = !data.objectType ()
         
           if !type eq 'POSITION' then
                !pos  = !data
                aid sphere number 9999 $!pos dia 20
           endif 
    endmethod 


    Ok so what this does is, 
    .pickSinglePoint() will execute all the way to the endmethod; you will see "the code ran to it's end" prompt

    At this time, AVEVA will initiate a pick event, and you can start picking. Every time you pick on an element on screen, .action() method will execute and draw a sphere in the point you have picked. This will go on until you hit ESC button: then the close() and escape() methods will execute. 

    This is just a silly example; you can obviously write whatever you need in .action()

    The main reason why you would do smething this complicated instead of just using your way, is: 
    - the picker stays active all the way until you have pressed ESC, you don't have to click the button and run the code every time you want to pick
    - Aveva doesn't freeze up while the picking is active, instead you can use all the forms and other tools you have opened; 
    - you can use the Aveva Positioning dialogue to adjust the picking method while picking, for example you can switch from snap pick to intersection and get a very precise pick. 

    The key little line here is this: !pick.definePoint('pnt')

    This informs the picker to actually return the POSITION value, ie it takes the pointvector and some plane somewhere (which I don't understand) and processes the POSITION automatically. 

    But there are many other options. For example, we could have used 
    !pick.definePosition('pick a position') instead of that. 

    That method would have returned EDGPOSITIONDATA object instead of POSITION, so we could write .action() as something like this:

    define method .action(!return is ARRAY)
          !data = !return[1]
          !type = !data.objectType ()
         
          -- you don't need the if, I'm just writing it to make the example more obvious     
          if !type eq 'EDGPOSITIONDATA' then
              q var !data
              -- a sphere at the "real" point of the pick, on the object
              !rpos  = !data.position.wrt(WORLD)
               aid sphere number 999  $!rpos dia 20

                -- a sphere at that weird pick point "somewhere in space" and an arrow 
                -- indicationg the pointvector
                !pvector = !data.pointvector
                !pos = !pvector.position
                !odir = !pvector.direction
                aid sphere number 9999 $!pos dia 10
                aid arrow NUM 999 at $!pos   dir $!odir hei 100 prop 0.7
                
                -- namesq of the picked part (assuming it's piping) at the actual position of the pick
                !part = !data.item
                !name = !part.namesq
                aid text NUM 999 '$!name' at $!rpos
           endif 
    endmethod 

    So now we got lot more info from just a single pick.


    In the manual, you can find definitions for other methods, like 
    !pick.plinePick('pick A Pline')
    or 
    !pick.aidPick('pick an aid')
    etc. 

    But it allows you to do even more, you can use ,for example, 

    !pick.defineLine(|pntPnt|)

    This method returns a LINE object and it will allow you to run .action() method every TWO picks. 

    So you pick two points in the view, and THEN the .action() method runs, and we can write it like this: 

    define method .action(!return is ARRAY)
        !data = !return[1]
        q var !data
        !type = !data.objectType ()


         if !type eq 'LINE' then
            !line = !data
            !spos = !line.startPosition
            !epos = !line.endPosition
            !dsize = !line.length()
           
            -- just for fun
            !pvector = !line.pointvector()
           
            -- orientation can be gotten from the plane
            -- which is normal to the line's pointvector
            !ori = !line.plane().orientation
            -- moddle position
            !mpos = !line.proportion(0.5)

            aid sphere number 999 $!spos dia 20
            aid sphere number 999  $!epos dia 20
            aid sphere number 999 $!mpos dia 20

            aid cyli num 9999 AT $!mpos ORI $!ori HEI $!dsize DIA 10 FILL ON

        endif
    endmethod

    You can use this to measure distances for example, though in the manual there's also a similar method just for that, !pick.defineMeasure(|distance|) ; and then there's methods whoich allow you to execute .action() after THREE picks, allowing you to define angles, arcs or planes. 

    All that said... 

    I can't for the life of me manage to get the methods that return a POSITION to process in Paragon, so I would like to try your method ("I create the pointvector from the above and then create a plane on the item I'm interested in")  to get the correct position from an EDGPOSITIONDATA  object... 
       
  • Hi,

    See below

    var !Pick pick

    handle ANY
    break
    endhandle

    !Gen = !Pick[1].Dbref()
    !Pos = !Pick[2].After('Through').Position()
    !DirString = !Pick[2].Before(' Through').after('Line ').direction()
    !Vector1 = object pointvector(!pos, !DirString)

    if !Gen.Type.eq('GENSEC') then

    !pt1 = !Gen.plst.lmid.wrt(world)
    !pt2 = !Gen.plst.rmid.wrt(world)

    !dir = before(string(!pt1.direction(!pt2)), ' WRT')
    !Zdir = 'Z is ' & !dir
    !Ori = object orientation(!Zdir)
    !plane1 = object plane(!pt1, !Ori)
    !int = !Vector1.intersection(!Plane1)

    !gsz = !gen.catref
    !fgsz = fullname of $!gsz

    aid text '$!fgsz' at $!int